GETTING STARTED
Preliminary Installation Setup
Install GNS3
Install VirtualBox
Get ahold of the .vmdk and aboot.iso files
It is recommended to install VirtualBox AFTER you install GNS3 to avoid problems with GNS3 detecting VirtualBox.
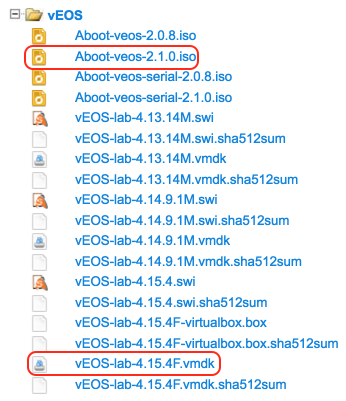
Go to www.arista.com, and go to Support > Software Download. The two files you’ll want are the .vmdk file as well as the Aboot .iso file:
Creating the Management Network
To simulate an out-of-band management network, we will create a vboxnet interface, similar to a loopback interface, on our laptop. This will also allow us to interact with our virtual machines via SSH, etc.
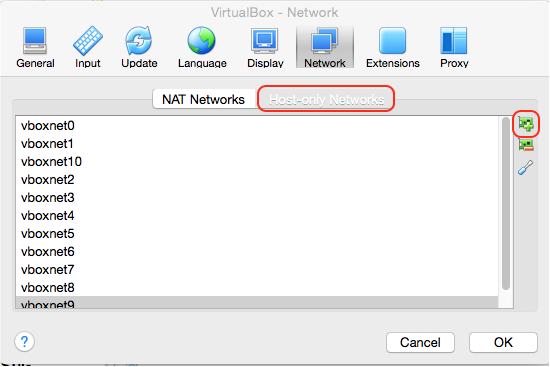
Open VirtualBox, go to Preferences, and click Network. Select “Host-only Networks”, and then click the NIC adapter image with a plus symbol on it to add a new host-only network if there isn’t one already:
Select your newly-created vboxnet and click the screwdriver icon to configure it:

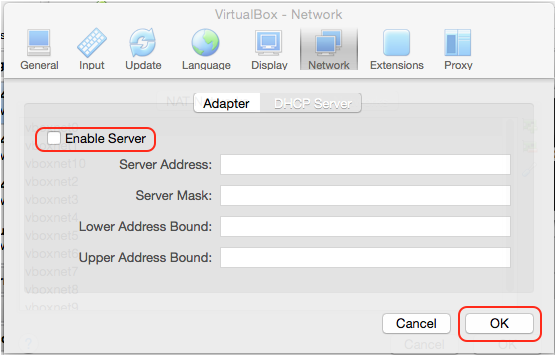
We’re going to be using ZTP to provision our switches, so select “DHCP Server”, ensure “Enable Server” is unchecked, and then click OK:
Verify you have a new interface reflecting your vboxnet configuration:

SETTING UP vEOS
Creating a Base Image
You’ll want a nice, clean base image to create clones from.
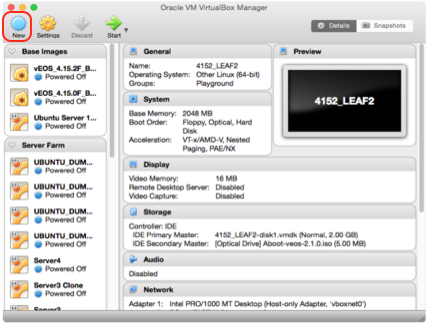
To begin, in VirtualBox, click New:
Give your base image a name. Use the drop-down menus to set the Type to “Linux”, the Version to “Other Linux (64-bit)”, and then click Continue:

Set the memory allocation to 2048, and then click Continue:

Select “Use an existing virtual hard disk file”, select the .vmdk file you downloaded earlier, and click Create:

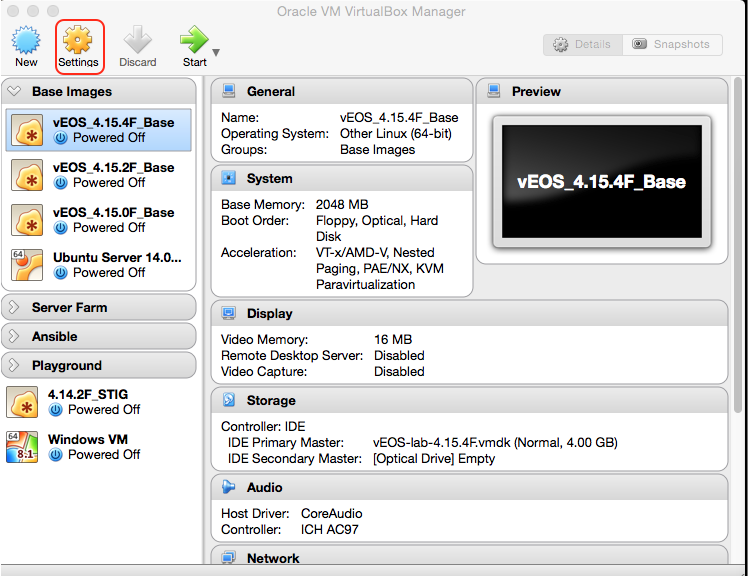
Our base image has been created, but now must be configured. Select the new base image, and click Settings:
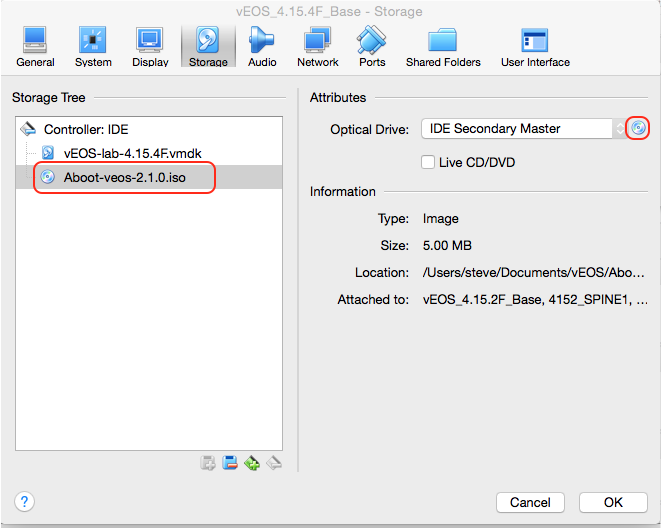
Click Storage, and then use the drop-down menu to set the second entry under “Controller: IDE” to IDE Secondary Master, then click the small CD icon and select the Aboot.iso file downloaded earlier
Click Network, select Adapter 1, ensure “Enable Network Adapter” is checked, and use the drop-down menu to select “Host-only Adapter”. Ensure the Name is populated with the management network created in the previous section, use the drop-down menu to set the Adapter Type is set to “PCnet-FAST III”, and ensure that “Cable Connected” is checked. Click OK to save your changes:
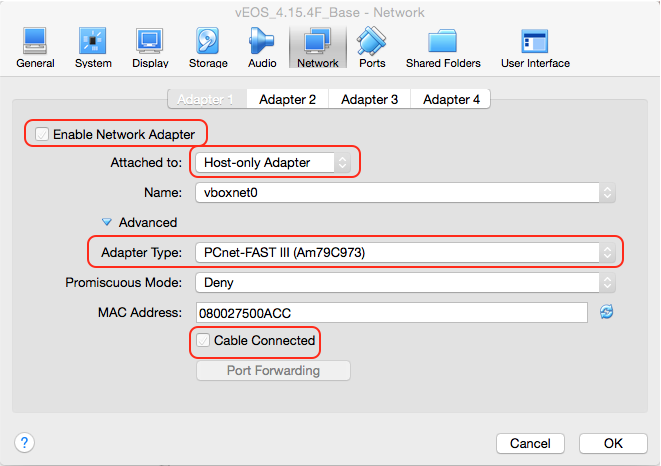
Leave the rest of the Adapters alone - these will be configured for you by GNS3 later.
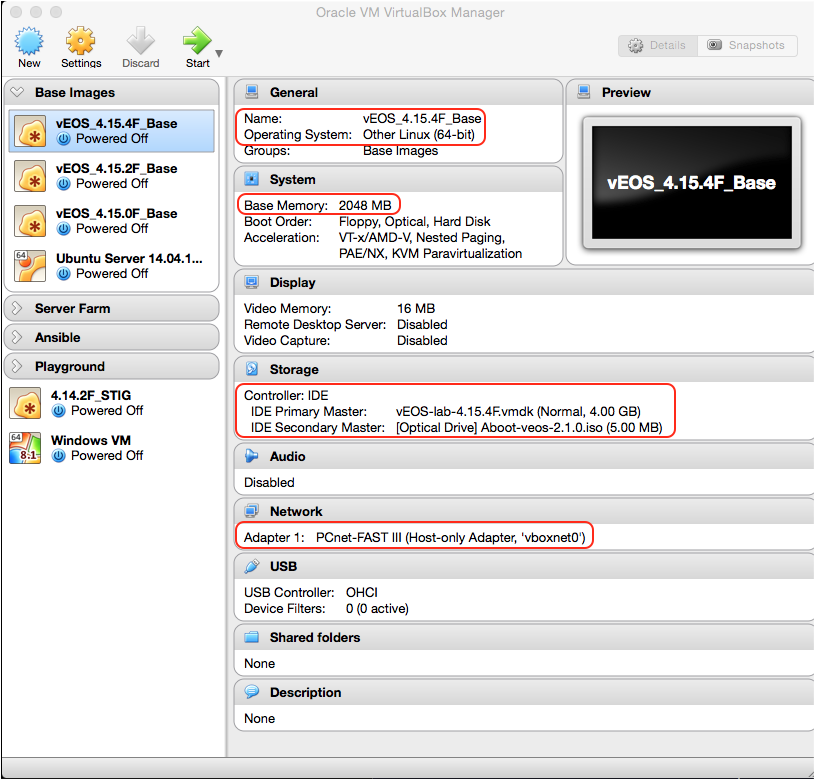
Verify your base image settings and launch the VM to verify it successfully boots:

TIP!
At this point, you have a decision to make. You can either leave the base image as-is and configure everything on the clones that you will make, or if there’s something that will be configured on every clone, such as a username, you could configure this in your base image so that you won’t have to do it on your clones. For our lab though, we’re going to be provisioning everything with ZTP and Ansible, so I’m going to leave the base image as raw as possible. If you noticed, we created a host-only adapter in our base image so that every time we create a clone, it will already have its first adapter be its management connection. You’ll see why later.
|
Creating Clones
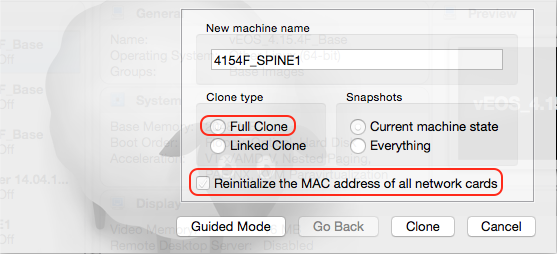
If you haven’t already, shut down your base image. Now, in VirtualBox, right-click it and select “Clone”. Click “Expert Mode” - because you’re clearly too awesome for that guided nonsense (And doing it this way is just quicker). Give your clone a name, ensure that “Full Clone” and “Reinitialize the MAC address of all network cards” is selected, and then click Clone - repeat as necessary to create additional clones:
WARNING!
This part is very important. If you select “Linked Clone”, your clone will be linked to the base image instead of creating its own file. This means if you accidentally choose to delete all files when you delete your clone later, it will also effectively delete your base image as well.
If you do not select “Reinitialize the MAC address of all network cards”, all clones will have the same MAC address as your base image, and you can imagine the fun that will create in your virtual network.
|
GETTING STARTED IN GNS3
Adding VMs to GNS3
GNS3 has very tight integration with VirtualBox. As you create connections between your vEOS instances, server VMs, etc., GNS3 takes care of all configuration needed on your VirtualBox VMs for you - no manual configuration needed inside of VirtualBox itself for each new connection.
To get started, we’ll need to add our newly-minted cloned vEOS instances to GNS3. Open GNS3, start a new project, and then open Preferences. Go to VirtualBox > VirtualBox VMs, click New, use the drop-down menu to select your newly-created clones, and then click Finish - repeat as necessary:

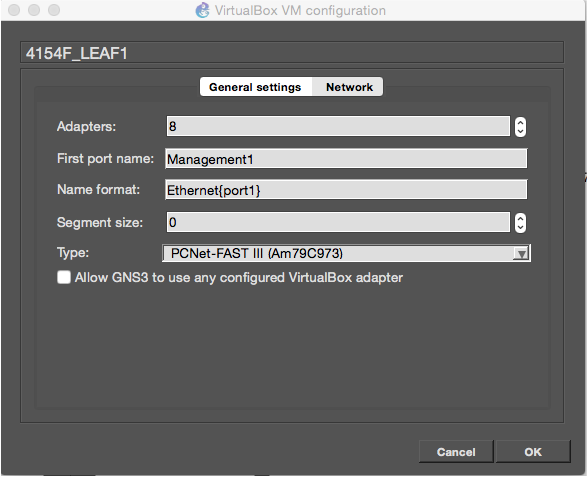
Select your VM and click Edit. Under “Network”, configure the following and then click Ok, repeating as necessary for each VM:
NOTE
At the time of this writing, VirtualBox can support a maximum of 8 adapters. Refer to the article in “Resources/Recommended Reading” for details. The first adapter will be your management interface, hence the “First port name:”, and then you’ll have an additional 7 interfaces to play with.
|
TIP!
If you want your VM to cosmetically appear more like a switch in GNS3, under “General Settings”, set the Category to “Switches”, and change the Symbol to “Multilayer Switch”.
|
Click Apply, and then click OK to exit.
Now that our vEOS VMs are configured in GNS3, we can start building our virtual network. On the main project screen, click “Browse All Devices”, and then drag-and-drop your VMs onto the topology panel (the center panel):

Click “Add a Link”, click one VM, select “Ethernet1”, and connect it to your other VM on the same interface:

Click “Start/Resume all devices”, and when the VMs are finished booting, setup some VLANs and SVIs and verify you have connectivity:
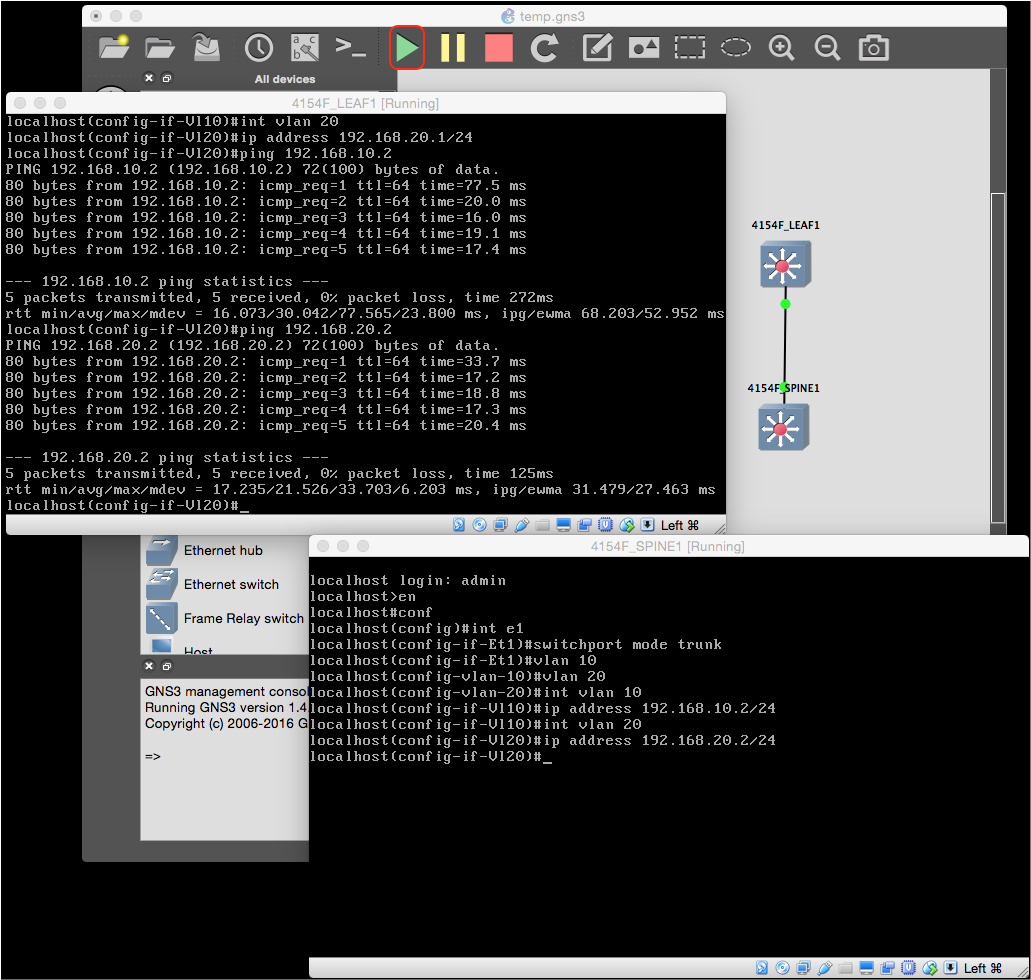
Great! Let’s move on to providing “bare-metal” provisioning with ZTP.
No comments:
Post a Comment